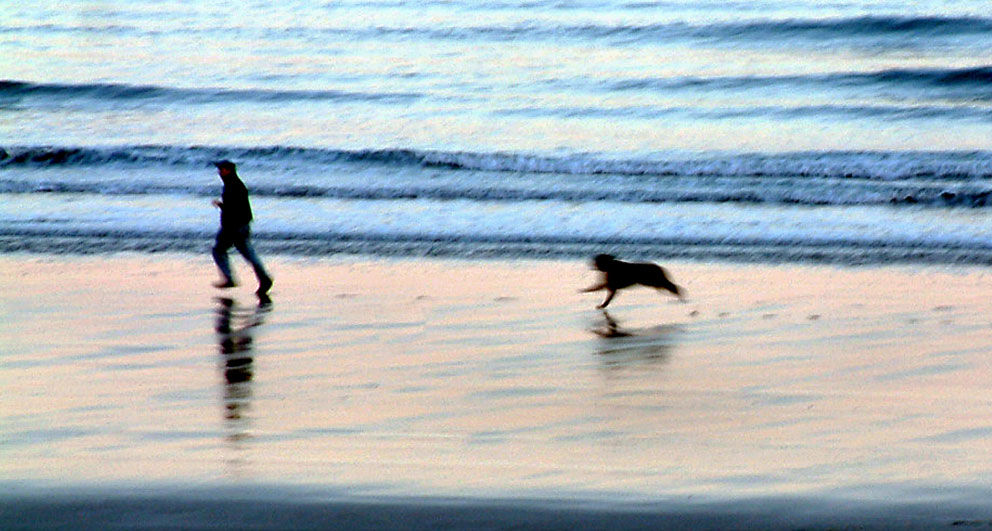
back Places
Places
Nikon D2XsPlaces
Nikon D2XsLight effects of cars achieved by shooting with a long time exposure. With tripod mounted camera set to F16 and a cable release to press the shutter and hold it down for approximately 10 seconds before releasing the cable, closing the shutter and completing the timed exposure.
A few attempts were required varying from 5 to 15 seconds.
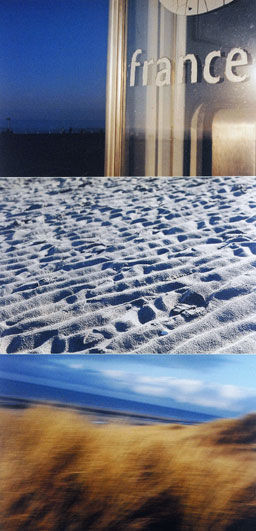
Places
Nikon D2XsPlaces
Places
Nikon D2XsPlaces
Nikon D2Xs
Places
Nikon D2XsPlaces

Nikon D2XsPlaces
Canon IxusPlaces
Nikon D2XsPlaces
Nikon D2Xs
Places
Nikon D2XsPlaces
Nikon D2XsPlaces
Nikon D2XsPlaces
Nikon FE 35mm Film cameraPlaces
Nikon D2XsPlaces
Nikon FE 35mm Film cameraPlaces

Nikon D2Xs.Places
Nikon D2XsPlaces
Nikon D2XsPlaces
Nikon D2XsPlaces
Nikon D2XsPlaces
Nikon D2XsPlaces
Nikon D2XsPlaces
Nikon D2XsPlaces
Nikon D2XsPlaces

Nikon D2XsPlaces
Nikon D2Xs
Places
Nikon D2Xs
Places
Nikon D2Xs
Places
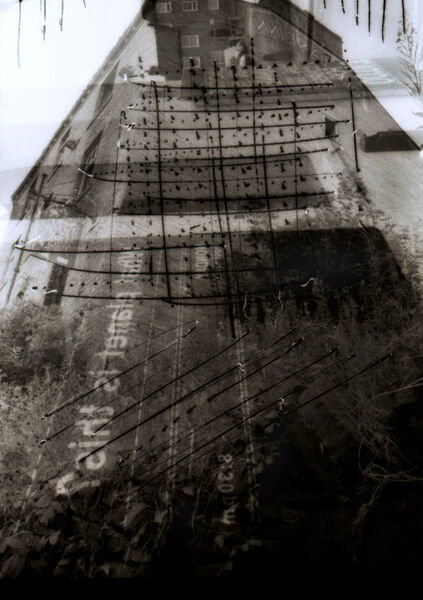
Shot on a Nikon FE 35mm film camera with Ilford HP5 b+w film.
Film processed as usual and a straight print created under the Enlarger in the darkroom.
The overall finished look is decided upon and i then source materials and objects that will help to achieve it. For the finished print I place the different objects over the paper which is in the masking frame under the enlarger.
The cluttered photographic paper is exposed to light for the same amount of time as the straight print and then developed and fixed as usual.
Experimental and slightly un predictable piece of photographic imagery is achieved.
Places
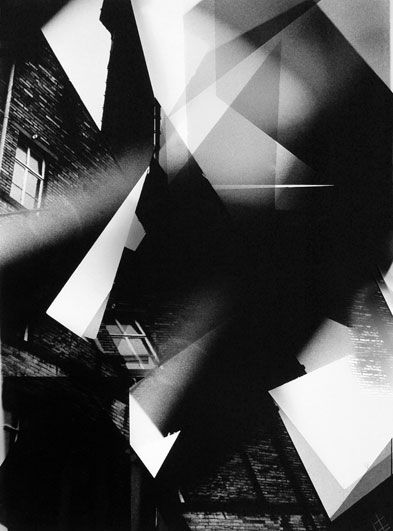
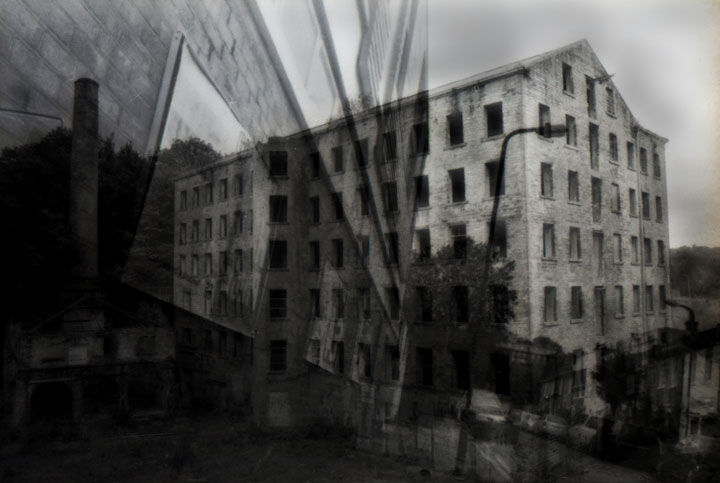
Shot of Victorian Mill taken on a Nikon FE 35mm Film camera. Film processed as usual and the Mill shot chosen for this Experimental finished image.
The Exp finished image was achieved by doing a straight test print to determine enlarger exposure times. Next a new sheet of photo paper was exposed but the masking frame was then quickly moved around and rotated under the enlarger to expose the negative to different parts of the paper for different times.
This created the distorted, overlapped and in some places slightly overexposed finish.
Places
Nikon FE 35mm film camera.
Places
Canon Ixus Manual setting
Places
Canon Ixus Manual setting
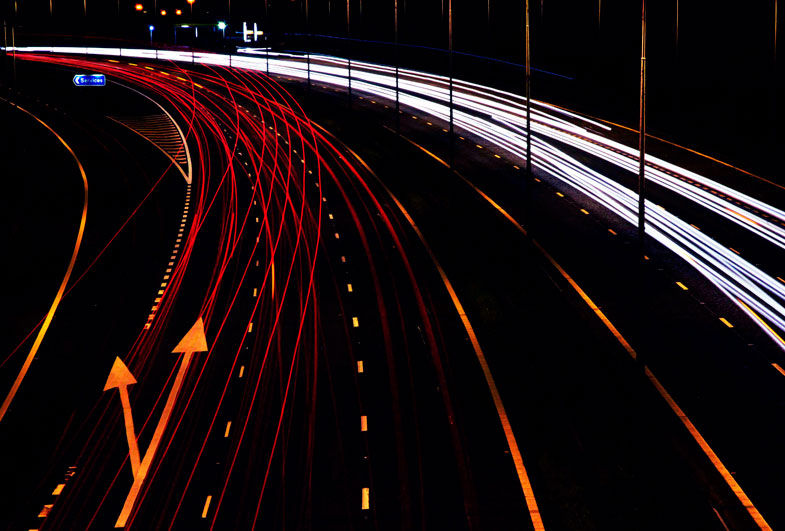
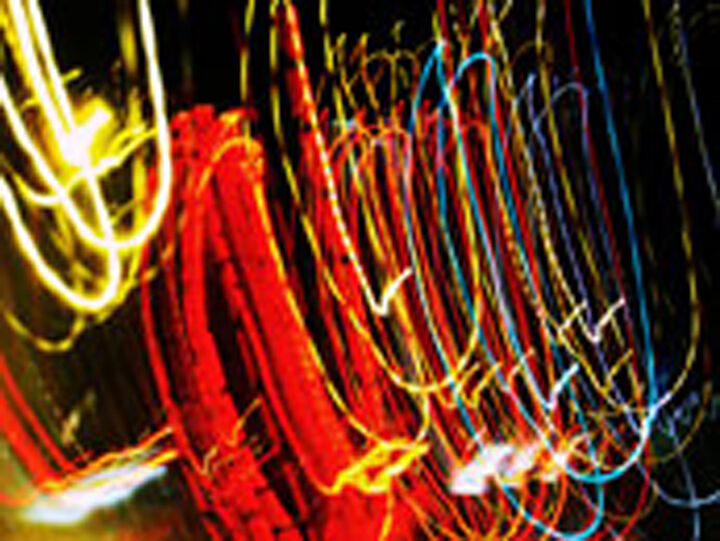
Image of rear car lights whilst at traffic lights. This distorted effect was achieved by me knowing that the shutter speed would be set to a slow time by the camera itself given the very low light /nighttime conditions.
With this in mind I took the picture whilst very quickly moving and zigzagging the camera around to make the car lights and colours dance.
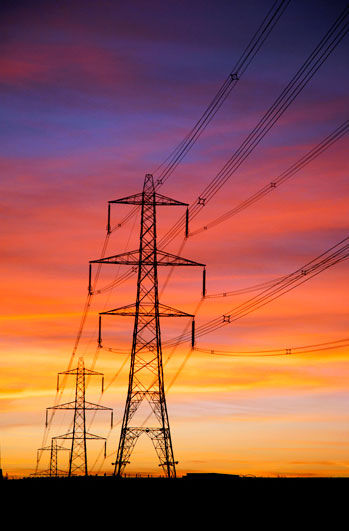
Places
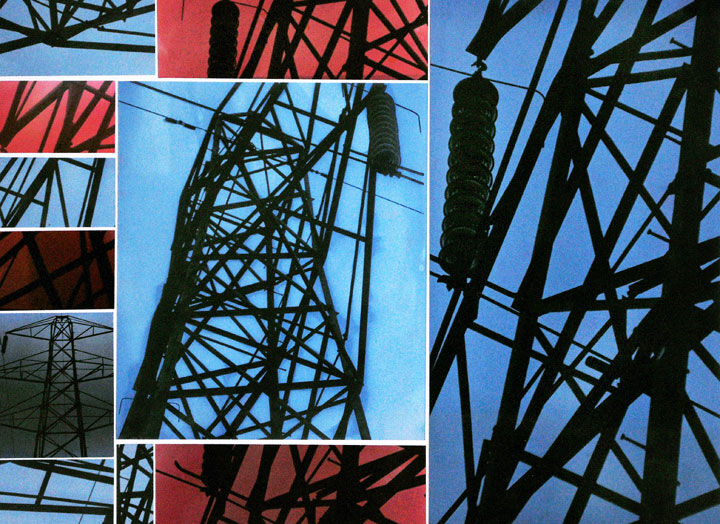
Shot on a Nikon FE 35mm film camera with b+w film.
Film processed as usual and different prints of the pylons were created in the darkroom. The enlarger head was moved up and down to enlarge parts of the pylons being projected onto the photographic paper in the masking frame underneath.
The different prints were used to create the finished result, some prints had small sections cut out which were also used.
Food dye was used for the coloured effect on the prints.
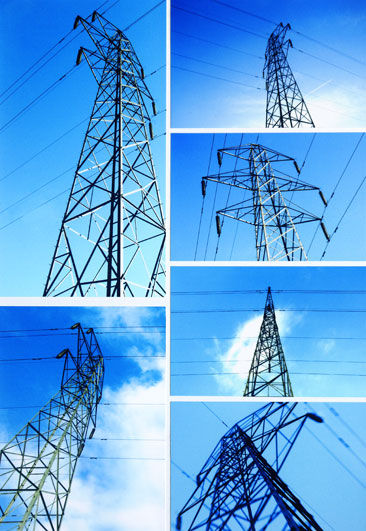
Places
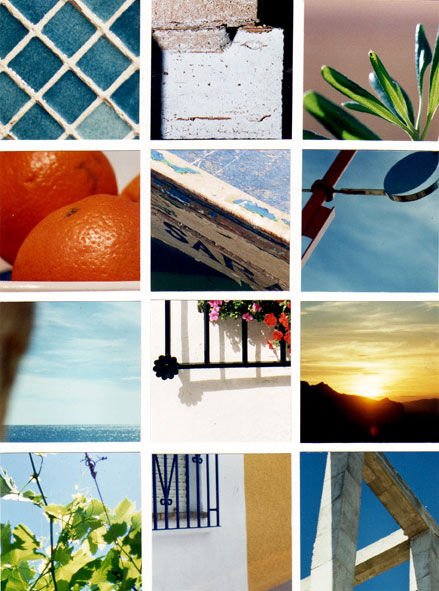
Shot on a Nikon FE 35mm film camera with Fuji colour film.
Small Square sections of the processed prints were cut out using a surgical scalple and mounted on white card to achieve the finished result.
The artwork was then scanned on a flat bed scanner to create a high res jpeg file.
Places
2 B+W Ilford negs clamped together in a neg holder and placed in an Epson V350 Photo Scanner. The negatives were then scanned@4800 ppi so as much detail was obtained for a high quality jpg file.
[One negative has been intentionally scratched with a scalple to add to the distorted effect]
The question asked of the viewer ‘What planet is this’ which is spelt backwards adds to the confusion.
Places
2 B+W Ilford negs clamped together in a neg holder and placed in an Epson V350 Photo Scanner. The negatives were then scanned@4800 ppi so as much detail was obtained for a high quality jpg file.
The dodging tool was required where the negatives overlapped to reshow the detail of the Mill.
I love Victorian and early 20th Century Industrial buildings. They portray strength and confidence, the quality of construction and materials surpasses anything built today.
I intentionally placed the left neg image at the specific [arrow like angle] point into the right sided neg image of the Mill ruins.
It adds slight aggression to the strength and boldness of the red bricked street workshop and the Victorian Mill.
Places
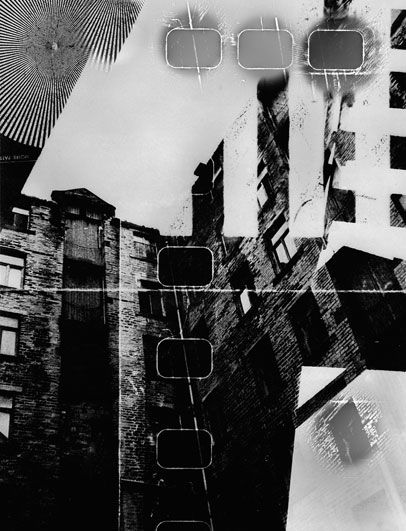
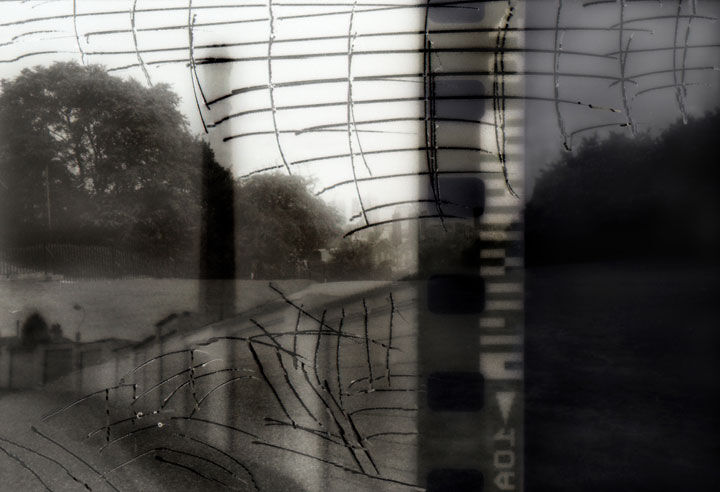
3 B+W Ilford negs clamped together in a neg holder and placed in an Epson V350 Photo Scanner. The negatives were then scanned@4800 ppi so as much detail was obtained for a high quality jpg file.
The 3 negatives were aligned and fixed in place with masking tape.
Three neg images are involved here to create a layered effect and to depict a slow morphing of one image to another with help of the central 3rd negative.
Yorkshire has a blend of natural beauty, fantastic industrial revolution period architecture and..... 50’s/60’s post-modernist residential architecture which visually undermined many urban landscapes.
Places
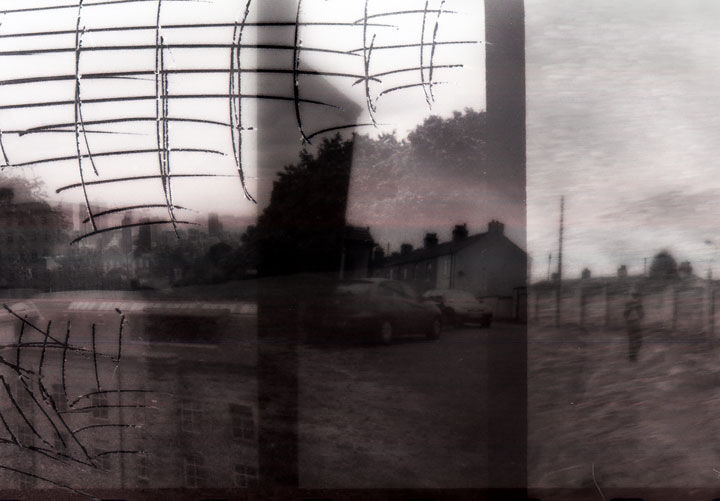
3 B+W Ilford negs clamped together in a neg holder and placed in an Epson V350 Photo Scanner. The negatives were then scanned@4800 ppi so as much detail was obtained for a high quality jpg file.
The 3 negatives were intentionally mis-aligned and fixed in place with masking tape. Again three neg images are involved here to create a layered effect and to depict a slow morphing of one image to another with help of the central 3rd negative.
Powerful architecture and subtle nature combine to show the North’s positives. The image then moves away to show a gradual bleakness of landscape and sense of despondancy as depicted by the forlorn figure walking home.
Places
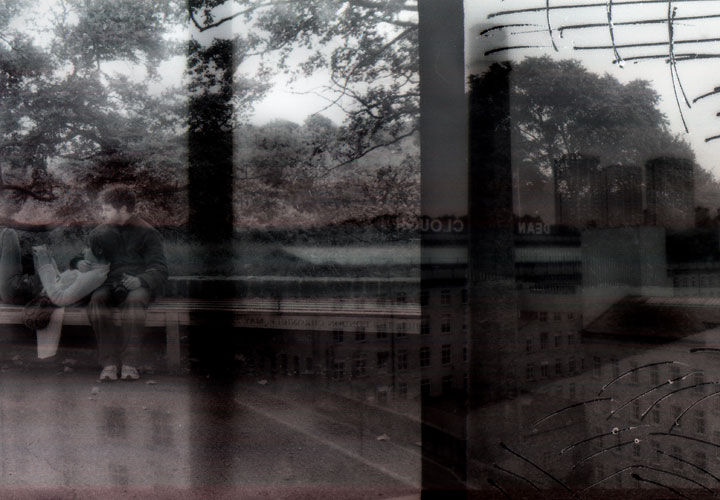
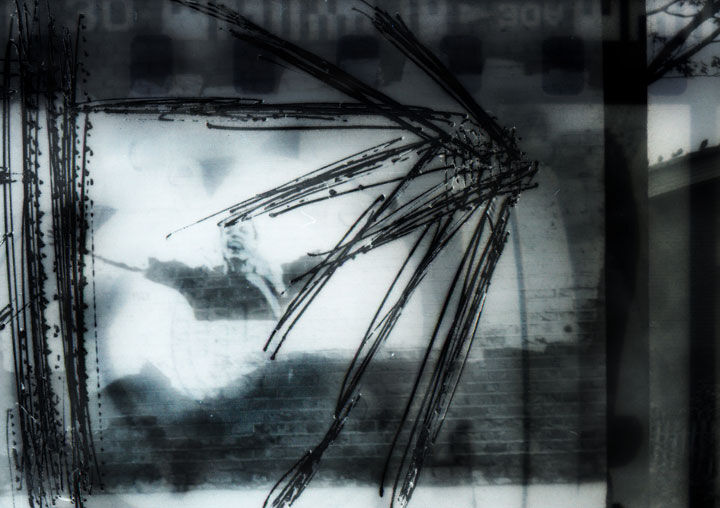
3 B+W Ilford negs clamped together in a neg holder and placed in an Epson V350 Photo Scanner. The negatives were then scanned@4800 ppi so as much detail was obtained for a high quality jpg file.
The 3 negatives were intentionally mis-aligned and fixed in place with masking tape. In the 19th and early 20th centuries our beautiful Victorian City Parks were almost a retreat for mill workers and famillies. They provided a change of scenery and the serenity was at stark contrast from the dangerous/noisy working conditions and long hours that millworkers endured.
The grooves of the neg edge create an unorthodox but intentional vertical border within the image, separating the vastly underexposed double negged portion of the collage from the rest.
Places
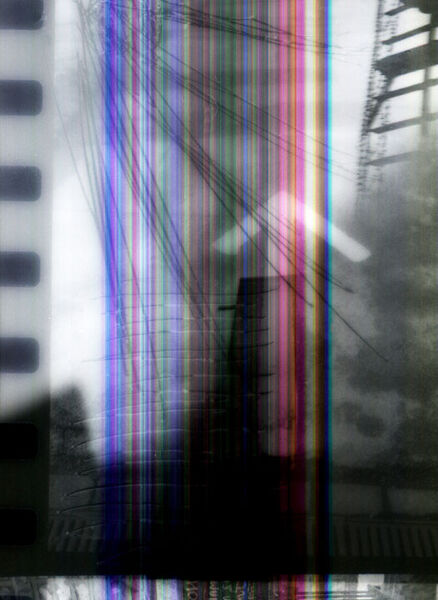
2 B+W Ilford negs clamped together in a neg holder and placed in an Epson V350 Photo Scanner. The negatives were then scanned@4800 ppi so as much detail was obtained for a high quality jpg file.
With technology, happy accidents happen... i’ve not got a clue what caused the red, green and blue streaks of colour.....
The finished effect looks fantastic.
Places
Places
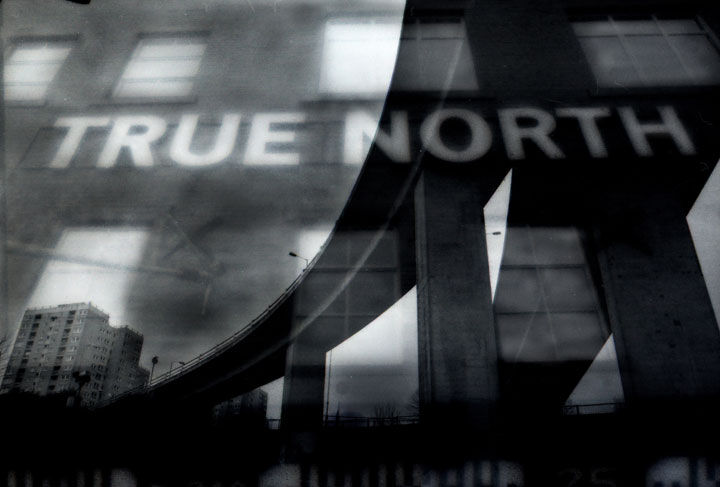
2 B+W Ilford negs clamped together in a neg holder and placed in an Epson V350 Photo Scanner. The negatives were then scanned@4800 ppi so as much detail was obtained for a high quality jpg file.
A lot of dodging and burning [Photoshop equivalant] was required for this image.
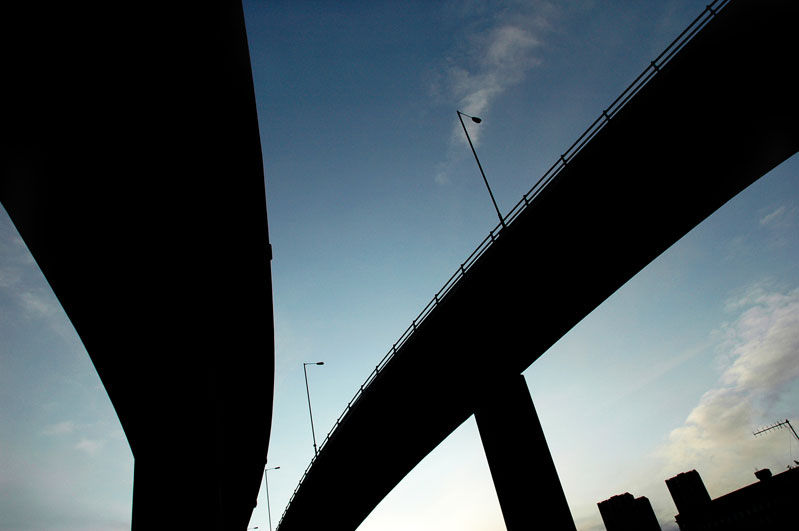
When the original viaduct shot was captured in camera i had to overexpose by 2 or 3 stops to get some visual “detail” in the flyover’s underbelly and support columns as a result the clouds and highlight detail were lost in the sky.
Fortunately this allowed the mill facade and detail to really show through during scanning.
Again this image screams, Power, Strength and hardiness.
True North indeed.
Places
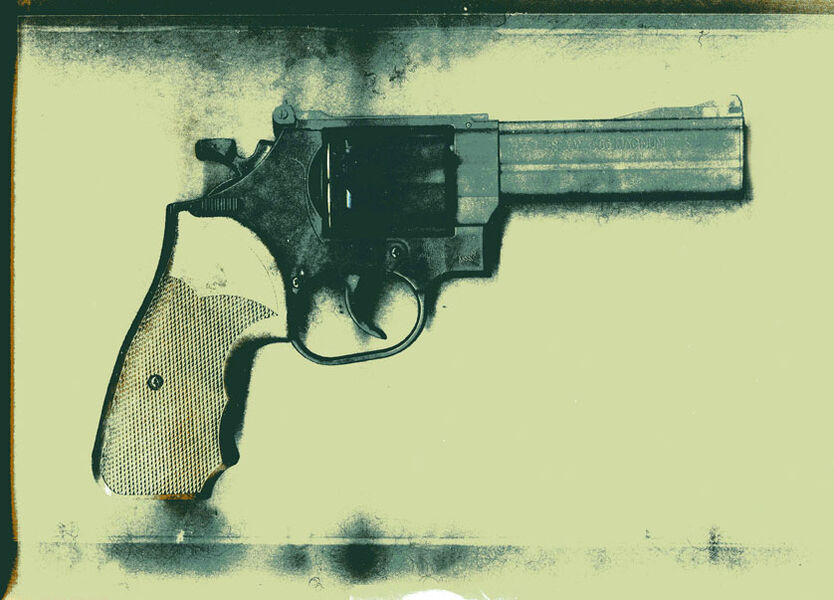
A direct scan of a lifesized copy of a short barelled magnum handgun. [Made famous by Clint Eastwood]
This was placed on the flat bed of the scanner and scanned at 300 ppi for a high res jpg file.Minor retouching and dust speck removal was initially required.
The gun looked to be hovering against the background and I wanted to create a rustic interesting border to frame the object. This was achieved by placing a slim cardboard box cover over the gun on the flat bed scanner and placing the scanner lid above.
Some light from the scanner could escape,some natural light was able to sneak in and the colour, markings, masking tape holding the box lid together all contributed to create the border effect. I love it.
Places
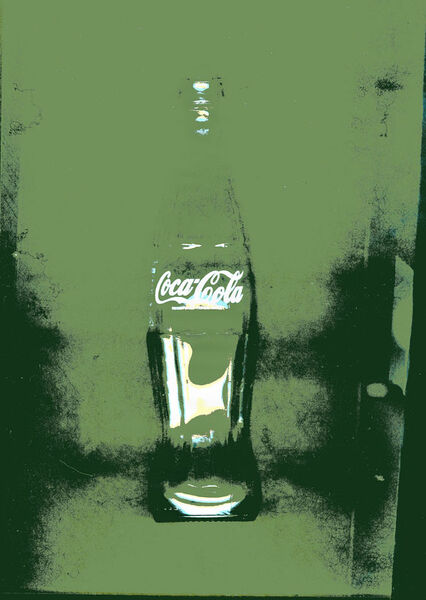
A direct scan of the iconic glass Cola bottle.
This was placed on the flat bed of the scanner and scanned at 300 ppi for a high res jpg file. Minor retouching and dust speck removal was initially required.
Again I wanted to create a border.
This was achieved by placing a slim cardboard box cover over the bottle on the flat bed scanner and placing the scanner lid above. Some light from the scanner could escape,some natural light was able to sneak in and the colour, markings, masking tape holding the box lid together all contributed to create the border effect.
Also part of the bottle could not be completely covered by the box lid. this caused the border to appear to be leaning in towards the bottle at the bottom of the image.
Khaki green is not associated with the cola brand but it works and helps to create a screen print effect.
Places
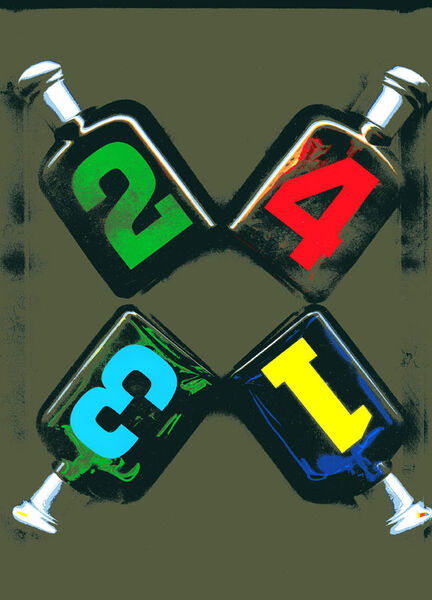
A direct scan of 4 Ralph Lauren Aftershave bottles.
These were placed on the flat bed of the scanner and scanned at 300 ppi for a high res jpg file. Minor retouching and dust speck removal was initially required.
Again I wanted to create a border.
This was achieved by placing a slim cardboard box cover over the bottles on the flat bed scanner and placing the scanner lid above. Again some light from the scanner could escape,some natural light was able to sneak in and the colour, markings, masking tape holding the box lid together all contributed to create the border effect.
Post scan I slightly increased contrast and saturation levels to make the colours punchy. Again it looks so similar to a screen print.